The post togglo リリースノート first appeared on ヰ刀のおもちゃ箱.
]]>複数ラベルが存在した場合、一番最初につけているラベルがtogglのプロジェクトとなります。
ラベルがついていない場合はボード名がプロジェクトに設定されます。
文字無ラベルは反映されません。
機能の提案をしていただいたPiro様ありがとうございます。
「進行中」のカード上でラベルの変更を行った場合、togglに変更後のラベルでtogglを再計測するような機能を追加。(β版:(2回restartされるが機能的には問題ないためβリリース))
→こちらについてはラベルが2つ以上つけられた場合、trello上で全く同じ更新が二回走るためTrello側に直してもらわないといけなさそう。
初期リリース
The post togglo リリースノート first appeared on ヰ刀のおもちゃ箱.
]]>The post nginxのLogFormat設定の改善 first appeared on ヰ刀のおもちゃ箱.
]]>
log_format main '$remote_addr - $remote_user [$time_local] "$request" '
'$status $body_bytes_sent "$http_referer" '
'"$http_user_agent" "$http_x_forwarded_for"';
ログには以下のように出力される
172.17.0.1 - - [01/Aug/2021:02:48:02 +0900] "GET / HTTP/1.1" 200 612 "-" "curl/7.64.1" "-"
172.17.0.1 - - [01/Aug/2021:02:48:03 +0900] "GET / HTTP/1.1" 200 612 "-" "curl/7.64.1" "-"
172.17.0.1 - - [01/Aug/2021:02:48:04 +0900] "GET / HTTP/1.1" 200 612 "-" "curl/7.64.1" "-"
なんとなくは分かるが、ハイフンになっている部分や数字などが何を表しているのかは分かりづらくなっている。
log_format main '"$time_local" client=$remote_addr '
'method=$request_method request="$request" '
'request_length="$request_length" '
'request_uri="$request_uri" '
'request_body="$request_body" '
# If the header contains a module and you want to output it in the log
# 'module="$http_module" '
# If the cookie contains a sessionid and you want to output it in the log
# 'session_id="$cookie_sessionId" '
'status=$status bytes_sent=$bytes_sent '
'body_bytes_sent=$body_bytes_sent '
'referer=$http_referer '
'user_agent="$http_user_agent" '
'forwarded_for="$http_x_forwarded_for" '
'request_time=$request_time '
'upstream_addr=$upstream_addr '
'upstream_status=$upstream_status '
'upstream_response_time="$upstream_response_time"ms '
'upstream_connect_time="$upstream_connect_time"ms '
'upstream_header_time="$upstream_header_time"ms ';
ログは以下のように出力される
"02/Aug/2021:01:01:01 +0900" client=172.17.0.1 method=GET request="GET / HTTP/1.1" request_length="78" request_uri="/" request_body="-" status=200 bytes_sent=850 body_bytes_sent=612 referer=- user_agent="curl/7.64.1" forwarded_for="-" request_time=0.000 upstream_addr=- upstream_status=- upstream_response_time="-"ms upstream_connect_time="-"ms upstream_header_time="-"ms
"02/Aug/2021:01:01:03 +0900" client=172.17.0.1 method=GET request="GET / HTTP/1.1" request_length="78" request_uri="/" request_body="-" status=200 bytes_sent=850 body_bytes_sent=612 referer=- user_agent="curl/7.64.1" forwarded_for="-" request_time=0.000 upstream_addr=- upstream_status=- upstream_response_time="-"ms upstream_connect_time="-"ms upstream_header_time="-"ms
各項目に何を出力しているかを出力することで、出力値の意味がわかるようにした。
timeを出力する系の項目については単位(ミリ秒)をつけるようにした。
また、追加でupstream系の情報などを追加した。
# If the header contains a module and you want to output it in the log
# 'module="$http_module" '
headerにある値を出力するには $http_***
を使う
# If the cookie contains a sessionid and you want to output it in the log
# 'session_id="$cookie_sessionId" '
Cookieにある値を出力するには $cookie_***
を使う
The post nginxのLogFormat設定の改善 first appeared on ヰ刀のおもちゃ箱.
]]>The post docker nginxイメージのコンテナ内でlogrotateを起動させる first appeared on ヰ刀のおもちゃ箱.
]]>のような方法があると思います。
前者の場合は、コンテナ内はnginxに関することだけが動いているのでシンプルになります。
ただ、ログファイルの後始末に関しては常にホスト側で意識する必要があります。
後者の場合は、コンテナ内でnginxとは別にlogrotateも起動させるようなイメージになります。
ログのローテーションまで含めて全部コンテナの中で完結できます。
後者についての設定に関する知見を載せます。
FROM nginx:latest
# copy to nginx settings
COPY ./default.conf /etc/nginx/conf.d/
COPY ./nginx.conf /etc/nginx/
RUN apt-get update
##### rsyslog settings #####
RUN apt -y install rsyslog
COPY ./conf/rsyslog/50-default.conf /etc/rsyslog.d/
RUN update-rc.d rsyslog enable
##### logrotate settings #####
RUN apt -y install logrotate
# nginxのlogrotate以外は動かさない
RUN rm /etc/cron.daily/passwd
RUN rm /etc/cron.daily/dpkg
RUN rm /etc/cron.daily/apt-compat
RUN rm /etc/cron.daily/exim4-base
# copy to logrotate settings
COPY ./conf/logrotate/nginx_rotate /etc/logrotate.d/nginx
COPY ./conf/logrotate/daily_crontab /etc/cron.d/
COPY ./conf/logrotate/status /var/lib/logrotate
RUN update-rc.d cron enable
CMD service cron start && touch /etc/crontab /etc/cron.d/* && service rsyslog start && nginx -g 'daemon off;'
logrotateが上手く起動してくれなかった際のトラブルシュートを紹介します。
rsyslogで実行結果をログに出力します。
50-default.conf
を用意し、コンテナの中に格納する50-default.conf
cron.* /var/log/cron.log
Dockerfile
##### rsyslog settings #####
RUN apt -y install rsyslog
COPY ./conf/rsyslog/50-default.conf /etc/rsyslog.d/
RUN update-rc.d rsyslog enable
rsyslogによって、cronが実行された際にcron.logが生成されます。
出力ログの例
/var/log/cron.log
Aug 1 15:25:00 b3f825fd777a CRON[7148]: (root) CMD (test -x /usr/sbin/anacron || ( cd / && run-parts --report /etc/cron.daily ) >> /var/log/daily_crontab.txt 2>> /var/log/daily_crontab_error.txt)
cron.dailyの中のnginx以外のジョブの定義を削除しました。
Dockerfile
# nginxのlogrotate以外は動かさない
RUN rm /etc/cron.daily/passwd
RUN rm /etc/cron.daily/dpkg
RUN rm /etc/cron.daily/apt-compat
RUN rm /etc/cron.daily/exim4-base
cronの設定値を設定したのに動作せず、全て*の毎分設定だと動いたため、以下のようにcronを設定しました。
* * * * * root test -x /usr/sbin/anacron || ( cd / && run-parts --report /etc/cron.daily ) >> /var/log/daily_crontab.txt 2>> /var/log/daily_crontab_error.txt
毎分ジョブが起動するようになっている上で、nginxのlogrotateのローテーション設定の方で日付が変わったらローテーションされるように設定しています。
nginxのlogrotate設定ファイル
/var/log/nginx/*.log {
daily
maxsize 1
missingok
notifempty
rotate 180
dateext
compress
delaycompress
create 0640 www-data adm
sharedscripts
postrotate
if [ -f /var/run/nginx.pid ]; then
kill -USR1 `cat /var/run/nginx.pid`
fi
endscript
}
cron を起動した直後に作成された status では起動した日で登録されるため、daily で logrotate が設定されている場合翌日から rotate されるようになってしまうことがわかりました。
コンテナが再起動されることも想定すると、起動した日から logrotate を動作させるようにする必要があると思います。
なので、古い日付で作成された status をコンテナの中に格納することで当日もrotateされるようにしました。
statusファイル
logrotate state -- version 2
"/var/log/nginx/error.log" 1999-4-12-3:0:0
"/var/log/dpkg.log" 1999-4-12-3:0:0
"/var/log/apt/term.log" 1999-4-12-3:0:0
"/var/log/apt/history.log" 1999-4-12-3:0:0
"/var/log/alternatives.log" 1999-4-12-3:0:0
"/var/log/wtmp" 1999-4-12-3:0:0
"/var/log/btmp" 1999-4-12-3:0:0
"/var/log/exim4/paniclog" 1999-4-12-3::0
"/var/log/nginx/access.log" 1999-4-12-3:0:0
"/var/log/exim4/rejectlog" 1999-4-12-3::0
"/var/log/exim4/mainlog" 1999-4-12-3::0
Dockerfile
COPY ./conf/logrotate/status /var/lib/logrotate
Cron は (少なくとも Debian では) 1 つ以上のハードリンクを持つ crontab を実行しません。
Dockerはオーバーレイを使用しているため、ファイルへのリンクが複数になってしまいます。
そのため、スタートアップスクリプトでタッチして、リンクを切断する必要があります。
よって、DockerfileのCMDパラメータに下のtouchコマンドを追加します。
touch /etc/crontab /etc/cron.d/*
全容はこちらに載せています。
https://github.com/itouoti12/logrotate-in-nginx-docker
Cron and Crontab files not executed in Docker
Logrotate – nginx logs not rotating inside docker container
proxyなどでlogrotateやrsyslogがインストールできない場合は以下を参考にしてください。
The post docker nginxイメージのコンテナ内でlogrotateを起動させる first appeared on ヰ刀のおもちゃ箱.
]]>The post AZ-204: Developing Solutions for Microsoft Azureを2週間で合格する first appeared on ヰ刀のおもちゃ箱.
]]>試験日:7/24
勉強期間:7/14〜7/23(10日)
試験科目:AZ-204: Developing Solutions for Microsoft Azure
結果:776点(合格)
Azure経験:半年未満。なんとなく使っていたレベル。
平日の勉強時間:2〜3時間
休日の勉強時間:5時間くらい
とりあえずAzureの概要を理解すべきだと思い、ラーニングパスをやりました。
https://docs.microsoft.com/ja-jp/learn/certifications/exams/az-204
AZ-204のラーニングパスが地味に多くて結構かかりました。
ラーニングパスはAzureのサンドボックスを用意してくれるので、説明見るだけでなく実際に手を動かして理解につなげていくことができるのでとても良かったです。
Udemyの模擬試験があったのでそれを使いました。
https://www.udemy.com/course/az-204-developing-solutions-for-microsoft-azure-practice-tests/
セールだと1500円くらいになるのでおすすめです。
上のUdemyの模擬試験の注意点は問題文も解説も英語な点です。
ですが、結果的に英語ベースで取り組んだのはとても良かったと思いました。
なぜかは後述します。
下の流れで繰り返し取り組んでいきました。
本当はもっと早く始めたかったのですが、ラーニングパスで思ったより時間がかかってしまったので最後までやりきれませんでした。
6回分模擬試験があったのですが、3回分までしかやれなかったです。
前回自分が受けた時はまだ英語のみの対応だったのですが、日本語での対応がしっかりされてました。
なので、問題文がすらすら読めたのがまず大きかったです。
Udemyの模擬試験はてっきりあくまでも想定の問題集というレベルの認識でいたのですが、
ガッツリ同じ問題と答えの組み合わせが出てきました。ガッツポーズ。
これが英語で勉強して地味に良かったと思った点なのですが、
問題文の英単語から答えの選択肢が類推しやすいと感じました。
例えば
affect(影響)->Impactとか。
日本語で問題文見ていて、答えに迷ったら英語の問題文にして確認して・・・っていうのを実際試験中にやってました。
Udemy+Microsoft Learnのコンボで2週間弱で合格できたので別のも受けてみようと思います。
The post AZ-204: Developing Solutions for Microsoft Azureを2週間で合格する first appeared on ヰ刀のおもちゃ箱.
]]>The post Azure Learn 演習 – 入力バインディングを使用してデータを読み取る でCosmosDBから取得できない first appeared on ヰ刀のおもちゃ箱.
]]>ユニット5/8 演習 – 入力バインディングを使用してデータを読み取る
にて、ドキュメント通り操作したのにCosmosDBからデータを取得できない問題が発生しました。
結論から言うと、ドキュメントの「Azure Cosmos DB 入力バインディングを追加する」項目でのidの設定内容が間違っているようです。
ドキュメントUpdateされてないんですかね・・・?
Azure Cosmos DB input binding for an Azure Function doesn’t work
The post Azure Learn 演習 – 入力バインディングを使用してデータを読み取る でCosmosDBから取得できない first appeared on ヰ刀のおもちゃ箱.
]]>The post SonarQubeとprojectの連携方法(monorepo+React + TypeScript) first appeared on ヰ刀のおもちゃ箱.
]]>親プロジェクト配下に、project1,project2,commonのサブプロジェクトが存在するとして進めます。
[React.js]monorepo環境を構築する+typescript
sonarqube-scannerはプロジェクト共通でインストールします。(ルートプロジェクトから実行できればいい)
yarn add -W --dev sonarqube-scanner
jest-sonar-reporterは各プロジェクトでインストールします。
yarn workspace project1 add --dev jest-sonar-reporter
yarn workspace project2 add --dev jest-sonar-reporter
yarn workspace common add --dev jest-sonar-reporter
package.jsonを修正していきます。
...
"scripts": {
"test": "jest --setupFiles ./src/test/setup-tests.ts --coverage --testResultsProcessor jest-sonar-reporter",
},
"testResultsProcessor": "jest-sonar-reporter",
"jestSonar": {
"reportPath": "report",
"reportFile": "test-report.xml",
"indent": 4
}
...
scriptsのtest
カバレッジの出力とjest-sonar-reporterでのレポート出力を指定
testResultsProcessor
使用するレポート出力プロセッサを指定
jestSonar
レポートの出力先を指定している。
reportディレクトリにtest-report.xmlというファイル名で出力する
サブプロジェクトのscriptを実行して、ファイルが作られることを確認する
yarn workspace project1 test
yarn workspace project2 test
yarn workspace common test
reportの下にtest-report.xmlが作成されればOKです。
ルートにsonar-scanner.jsを作成する
const scanner = require('sonarqube-scanner');
scanner(
{
serverUrl: "http://localhost:9000",
options: {
"sonar.login": "admin",
"sonar.password": "password",
"sonar.projectKey": 'com.example.yourproject:react-monorepo-template',
"sonar.projectName": 'react-monorepo-template',
"sonar.language": "js",
"sonar.sourceEncoding": "UTF-8",
"sonar.exclusions": "./node_modules",
"sonar.exclusions": "**/build/**",
"sonar.exclusions": "**/test/**",
"sonar.modules": "packages/project1,packages/project2,packages/common",
"packages/project1.sonar.projectName": "project1",
"packages/project1.sonar.sources": "./src",
"packages/project1.sonar.tests": "./src",
"packages/project1.sonar.eslint.reportPaths": "report/eslint-report.json",
"packages/project1.sonar.testExecutionReportPaths": "report/test-report.xml",
"packages/project1.sonar.typescript.lcov.reportPaths": "coverage/lcov.info",
"packages/project2.sonar.projectName": "project2",
"packages/project2.sonar.sources": "./src",
"packages/project2.sonar.tests": "./src",
"packages/project2.sonar.eslint.reportPaths": "report/eslint-report.json",
"packages/project2.sonar.testExecutionReportPaths": "report/test-report.xml",
"packages/project2.sonar.typescript.lcov.reportPaths": "coverage/lcov.info",
"packages/common.sonar.projectName": "common",
"packages/common.sonar.sources": "./src",
"packages/common.sonar.tests": "./src",
"packages/common.sonar.eslint.reportPaths": "report/eslint-report.json",
"packages/common.sonar.testExecutionReportPaths": "report/test-report.xml",
"packages/common.sonar.typescript.lcov.reportPaths": "coverage/lcov.info",
"sonar.sources": "./src",
"sonar.tests": "./src",
"sonar.test.inclusions": "**/*.test.tsx,**/*.test.ts",
},
},
() => process.exit()
);
monorepo構成の場合、
sonar.modulesで指定したサブプロジェクトに対して、個別にsonar設定ができます。
その場合は、
[moduleで指定したサブプロジェクト名].sonar.[プロパティ]
という形で指定します。
次にpackage.jsonを修正します。
"scripts": {
"sonar": "node sonarqube-scanner.js"
},
yarn sonar
sonar-scanner.jsの一番下段の設定の
"sonar.sources": "./src",
"sonar.tests": "./src",
これをサブプロジェクトで設定しているからという理由で抜いていると、script実行時にエラーが発生します。
INFO: ------------------------------------------------------------------------
INFO: EXECUTION FAILURE
INFO: ------------------------------------------------------------------------
INFO: Total time: 1:19.402s
INFO: Final Memory: 6M/24M
INFO: ------------------------------------------------------------------------
ERROR: Error during SonarScanner execution
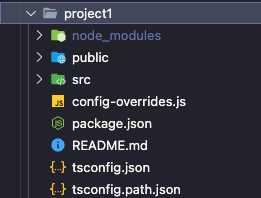
ERROR: File packages/project1/src/index.tsx can't be indexed twice. Please check that inclusion/exclusion patterns produce disjoint sets for main and test files
ERROR:
error Command failed with exit code 2.
SonarQubeとprojectの連携方法(Spring Boot,gradle)
SonarQubeで管理しているprojectのQualityGateの状態をAPIで取得する方法
[React.js]monorepo環境を構築する+typescript
Analysis Parameters – SonarQube
The post SonarQubeとprojectの連携方法(monorepo+React + TypeScript) first appeared on ヰ刀のおもちゃ箱.
]]>The post [React.js]create-react-appのlintからESLintへ移行する first appeared on ヰ刀のおもちゃ箱.
]]>monorepo環境のプロジェクトで実行方法をreact-app-rewiredに変えたり、
テストの実行方法をjestに変えたりしてカスタマイズした一環です。
yarn add --dev eslint @typescript-eslint/eslint-plugin @typescript-eslint/parser eslint-config-prettier eslint-plugin-jest eslint-plugin-jsx-a11y eslint-plugin-prettier eslint-plugin-react eslint-plugin-react-hooks prettier
package.jsonにeslintIgnore項目を追加します。
{
...
"eslintIgnore": [
"**/build/**/*.js",
"**/coverage/**/*.js",
"**/*.test.ts",
"**/*.test.tsx",
"**/*.stories.tsx"
]
...
}
package.jsonにESLintの実行コマンドを追加します。
{
...
"script": {
"lint_check": "yarn eslint --ext .js,.jsx,.ts,.tsx .",
"lint": "yarn eslint --ext .js,.jsx,.ts,.tsx -f json -o ./report/eslint-report.json"
}
...
}
ポイントとしては、ただのeslintコマンドの実行だと解析対象のファイルはjsだけとなり、typescriptを認識してくれません。
なので、 --ext
オプションを使ってtypescriptのファイルもlint対象に設定してます。
そして-f
オプションと-o
オプションを使い、json形式でレポートファイルを出力するように設定しています。
.eslintrc.yml
の作成
env:
es2020: true
jest/globals: true
parser: '@typescript-eslint/parser'
parserOptions:
project: ./tsconfig.json
ecmaFeatures:
jsx: true
plugins:
- react
- jest
- '@typescript-eslint'
settings:
react:
version: detect
jest:
version: 26
extends:
- eslint:recommended
- plugin:@typescript-eslint/eslint-recommended
- plugin:@typescript-eslint/recommended
- plugin:jest/recommended
- prettier
rules:
'@typescript-eslint/explicit-function-return-type': off
'@typescript-eslint/ban-types': off
'@typescript-eslint/explicit-module-boundary-types': off
'@typescript-eslint/no-explicit-any': off
'jest/no-conditional-expect': off
'jest/no-try-expect': off
'jest/no-jasmine-globals': off
インストールしたプラグインと設定ファイルのマッピング
yarn addしたパッケージ | .eslintrc.ymlの設定 |
---|---|
eslint | |
@typescript-eslint/eslint-plugin | extends – plugin:@typescript-eslint/eslint-recommended |
@typescript-eslint/parser | parser: ‘@typescript-eslint/parser’ |
eslint-config-prettier | extends – prettier |
eslint-plugin-jest | plugins – ‘jest’ |
eslint-plugin-jsx-a11y | plugins – ‘jsx-a11y’ |
eslint-plugin-react | extends: - eslint:recommended - plugin:react/recommended |
eslint-plugin-react-hooks | extends – plugin:react-hooks/recommended |
prettier | |
jest:
version: 26
vscodeで開発している場合、vscodeのlint機能とprojectのESLintが噛み合わずvscode上でエラーメッセージが頻繁に表示される場合があります。
その際の回避策としてESLintの設定上でjestのバージョンを指定すると解消されます。
参考:Unable to detect Jest version in create-react-app project
vscodeで開発している場合、vscode上での設定を追加しておきます。
[rootProject]/.vscode/settings.json
{
"files.autoSave": "afterDelay",
"prettier.jsxBracketSameLine": true,
"prettier.jsxSingleQuote": true,
"prettier.packageManager": "yarn",
"prettier.printWidth": 140,
"prettier.singleQuote": true,
"eslint.packageManager": "yarn",
"eslint.validate": ["typescript", "typescriptreact"],
"eslint.enable": true
}
[React.js]monorepo環境を構築する+typescript
[React.js]dotenvを利用して環境差分を吸収する
[React.js]jestとjest-html-reportersの導入
The post [React.js]create-react-appのlintからESLintへ移行する first appeared on ヰ刀のおもちゃ箱.
]]>The post [React.js]jestとjest-html-reportersの導入 first appeared on ヰ刀のおもちゃ箱.
]]>テストの実行形式をjestに変更し、なおかつtestの結果をhtmlで出力できるjest-html-reportersの導入をします。
React testに有効なEnzymeとその関連パッケージ、jest-html-reportersをインストールします。
yarn add -D @types/enzyme enzyme @types/enzyme-adapter-react-16 enzyme-adapter-react-16 ts-jest
yarn add -D jest-html-reporters
{
...
"scripts": {
"test": "dotenv -e ../../env/.env.test jest",
},
"jest": {
"preset": "ts-jest",
"globals": {
"ts-jest": {
"tsconfig": "tsconfig.json"
}
},
"moduleNameMapper": {
"\\.(jpg|jpeg|png|gif|eot|otf|webp|svg|ttf|woff|woff2|mp4|webm|wav|mp3|m4a|aac|oga)$": "<rootDir>/__mocks__/fileMock.js",
"\\.(css|less|scss|sass)$": "identity-obj-proxy",
"src(.*)":"<rootDir>/src/$1",
---- ↓ monorepo環境にて共通モジュールの読み込みがある場合は設定する↓----
"@common/(.*)":"<rootDir>/../common/src/$1"
---- ↑ ----
},
"reporters": [
"default",
[
"jest-html-reporters",
{
"hideIcon": true,
"pageTitle": "UT test report",
"publicPath": "./testreport",
"filename": "report.html",
"expand": true
}
]
],
"snapshotSerializers": [
"enzyme-to-json/serializer"
],
"setupFilesAfterEnv": [
"<rootDir>/src/setupEnzyme.ts"
],
}
...
}
fileMock.js
の作成projectの下にfileMock.jsを作成します。
画像ファイルや動画ファイルのモックをしてくれます。
//__mocks__/fileMock.js
module.exports = 'test-file-stub';
Enzymeの設定ファイルを作成します。
// src/setupEnzyme.ts
import { configure } from 'enzyme';
import EnzymeAdapter from 'enzyme-adapter-react-16';
configure({ adapter: new EnzymeAdapter() });
project/
├ __mocks__/
│ └ fileMock.js
├ src/
│ ├ App.tsx
│ ├ App.test.tsx
│ └ setupEnzyme.ts
└ package.json
yarn test
jest-html-reportersによって、testreport/report.htmlが出力されます。
[React.js]monorepo環境を構築する+typescript
[React.js]dotenvを利用して環境差分を吸収する
The post [React.js]jestとjest-html-reportersの導入 first appeared on ヰ刀のおもちゃ箱.
]]>The post [React.js]monorepo環境を構築する+typescript first appeared on ヰ刀のおもちゃ箱.
]]>1 つのリポジトリの中に複数のパッケージを同梱するリポジトリの運用方法
モノレポ入門 – Gutenberg が採用するリポジトリ戦略
yarnでmonorepoを使っていく場合は、
yarn workspace
を使います。
subprojectにパッケージをインストールする時は
yarn workspace subproject-name add package-name
となります。
root,subprojectをcreate-react-appで作っていきます。
# root projectを作る
npm init
# create-react-appをinstall
npm install create-react-app
# sub projectを作る
npx create-react-app packages/project1 --typescript
npx create-react-app packages/project2 --typescript
npx create-react-app packages/common --typescript
package.json
を修正以下の設定を追加します。
{
...
"private": true,
"workspaces": {
"packages": ["packages/*"],
"nohoist": ["**/react-scripts", "**/react-scripts/**", "**/@generated", "**/@generated/*"]
}
...
}
tsconfig.json
をルートプロジェクトに作成tsconfig.jsonを作成します。
{
"compilerOptions": {
"target": "es5",
"module": "esnext",
"strict": true,
"esModuleInterop": true,
"forceConsistentCasingInFileNames": true
}
}
monorepo化に必要なパッケージをインストールします。
yarn workspace project1 add react-app-rewired
yarn workspace project1 add -D customize-cra
yarn workspace project2 add react-app-rewired
yarn workspace project2 add -D customize-cra
package.json
修正以下の設定に修正します。
react-scriptsによる実行コマンドからreact-app-rewiredによる実行に変えてます。
```json
{
...
"scripts": {
"start": "react-app-rewired start",
"build": "react-app-rewired build"
}
...
}
```
tsconfig.json
修正以下の設定を追加します。
{
"extends": "./tsconfig.path.json",
...
}
tsconfig.path.json
の作成tsconfig.path.jsonを作成します。
共通モジュール用のディレクトリを「@common」という名前で認識できるようにします。
{
"extends": "../../tsconfig.json",
"compilerOptions": {
"baseUrl": "./",
"paths": {
"@common/*": ["../common/src/*"]
}
}
}
config-overrides.js
の作成config-overrides.jsを作成します。
const { removeModuleScopePlugin, override, babelInclude } = require('customize-cra');
const path = require('path');
function addAlias(config) {
config.resolve = {
...config.resolve,
alias: { '@common': path.resolve(__dirname, '../ common/src') },
};
return config;
}
module.exports = override(
addAlias,
//remove limitations of create-react-app
removeModuleScopePlugin(),
babelInclude([path.resolve('src'), path.resolve('../ common/src')])
);
いらないものを削っていきます。
src
ディレクトリ配下のソース全部消すpublic
ディレクトリも消すcreate-react-app
コマンドで作られた不必要なファイルを消す最終的に残るもの
src
ディレクトリpackage.json
readme.json
tsconfig.json
各 project のnode_modules
とyarn.lock
を消して再インストールし直しておきます。
これでmonorepo環境の構築は完了です。
common/src/Hello.tsx
import React, { ReactElement } from 'react';
interface Props {}
function Hello({}: Props): ReactElement {
return <div>view from Common packages!</div>;
}
export default Hello;
import Hello from '@common/Hello'
で importproject1/src/app.tsx
import React from 'react';
import logo from './logo.svg';
import './App.css';
import Hello from '@common/Hello';
function App() {
return (
<div className='App'>
<header className='App-header'>
<img src={logo} className='App-logo' alt='logo' />
<p>
Edit <code>src/App.tsx</code> and save to reload.
</p>
<a className='App-link' href='https://reactjs.org' target='_blank' rel='noopener noreferrer'>
Learn React
</a>
<Hello></Hello>
</header>
</div>
);
}
export default App;
yarn workspace project1 start
下段にcommonモジュールに作成した Helllo.tsx の「view from Common packages!」が表示されています。
SonarQubeとprojectの連携方法(monorepo+React + TypeScript)
yarn workspaceでmonorepo+TypeScript+Lint環境をつくる
The post [React.js]monorepo環境を構築する+typescript first appeared on ヰ刀のおもちゃ箱.
]]>The post [React.js]dotenvを利用して環境差分を吸収する first appeared on ヰ刀のおもちゃ箱.
]]>env
ディレクトリを作成し、.env.[環境名]
ファイルを作る.env.local
REACT_APP_ENV_NAME=hello_local_world
REACT_APP_[環境変数名]=値
という形で設定できます。
src 上で使用するときは、process.env.REACT_APP_[環境変数名]
で呼び出すことができます。
{
...
'scripts':
{
'start': 'dotenv -e ./env/.env.local react-scripts start',
'build': 'dotenv -e ./env/.env.local react-scripts build',
'build_staging': 'dotenv -e ./env/.env.staging react-scripts build',
'test': 'dotenv -e ./env/.env.test react-scripts test',
},
...
}
.gitignore
の.env.[環境名]
の行を削除する create-react-appで作成したprojectで自動的に作られる.gitignoreの中ではenvファイルがignoreされているのでこれを修正します。
# See https://help.github.com/articles/ignoring-files/ for more about ignoring files.
# dependencies
node_modules
.pnp
.pnp.js
# testing
coverage
# production
build
# misc
.DS_Store
# .env.local
# .env.development.local
# .env.test.local
# .env.production.local
npm-debug.log*
yarn-debug.log*
yarn-error.log*
# sonarQube
.scannerwork
これで導入は完了です。
App.tsxにenvを読み込む処理を追加します。
import React from 'react';
import logo from './logo.svg';
import './App.css';
const envName = process.env.REACT_APP_ENV_NAME;
function App() {
return (
<div className="App">
<header className="App-header">
<img src={logo} className="App-logo" alt="logo" />
<p>
Edit <code>src/App.tsx</code> and save to reload.
</p>
<a
className="App-link"
href="https://reactjs.org"
target="_blank"
rel="noopener noreferrer"
>
Learn React
</a>
<div>{envName}</div>
</header>
</div>
);
}
export default App;
実行
yarn start
下段にenvで設定した値が表示されています。
jest –coverageとdotenvを普通に組み合わせて使うと、coverageオプションが効きません。(jestコマンドで認識してくれない)
dotenv -e ./env/.env.test jest --coverage
coverageオプションを有効にするために、dotenvコマンドでの実行ではなくjestコマンドの実行としてenvファイルをオプションで読み込ませる形に変更します。
testコマンドを修正します。
{
"scripts": {
"test": "jest --setupFiles ./src/test/setup-test.ts --coverage"
}
}
setup-test.tsを作成します。
import dotenv from 'dotenv';
//test用のenvを読み込む
dotenv.config({ path: '../../env/.env.test' });
[React.js]monorepo環境を構築する+typescript
Using .env files for unit testing with jest
The post [React.js]dotenvを利用して環境差分を吸収する first appeared on ヰ刀のおもちゃ箱.
]]>